- Overview
- Starting the report generation wizard
- Customizing your report
- General Information report
- Relationship Information report
- Reviewing and printing results
- Summary
This chapter introduces you to the Vector NTI report generation capabilities, a convenient mechanism for customization of presentation of different types of molecule information. You will get detailed step by step instruction on creating both reports and report templates using our convenient user-friendly wizard. This chapter assumes that you are familiar with text pane of molecule display window, molecule design, using the Camera to copy information to the clipboard or file, and basic windows techniques, such as printer settings and printing.
The report generation wizard provides you with the capability to customize your presentation. It allows you to select the necessary information from the abundant data that Vector NTI generates for DNA/RNA or protein molecules. You can select a single molecule, several molecules, or an entire subbase for this process. The results are presented in a convenient tree structure, similar to the text pane of the molecule display window. The print preview regime reflects the actual appearance of the generated report printed on selected printer. The standard Vector NTI Camera allows you to copy selected information to the clipboard or file in text format This preserves most of the formatting and enables easy data exchange with other applications.
There are two types of reports implemented. The first represents general molecule(s) information, such as general description, standard fields, SSBM specific fields, user-defined fields, authoring information, comments, feature maps, restriction maps, sequence, components and fragments and all analyses performed for selected objects. The second report represents the parent/descendant relationship between molecules as well as construction information.
Due to the vast number of options to select from during report generation process, the Vector NTI software has report templates. These enable you to store the settings for generated report and give those settings a name. You will also be able to select one of your saved configurations at the very beginning of a report generation process instead of using the default settings.
The rest of this chapter describes report generation in detail.
Starting the report generation wizard
You can start the report generation wizard in two ways: from the database explorer window, or from a molecule display window.
Starting the wizard from the database explorer
The report generation wizard can operate on either selected molecules or a selected subbase. Just select the molecule you want and click the right mouse button (control click on the Macintosh) to display a context menu. You can also enter the 'Reports' menu of database explorer window and chose the report type you wish to generate. This method allows you to apply a certain set of parameters known as the display setup profile to all of the molecules included in the report. You may edit the setup profiles from a molecule display setup dialog (see Chapter 11, Molecule Display window setup). According to the selected profile, the report generator will produce the information that you requested. For both DNA/RNA and protein molecules, this report will include feature map and sequence setup information. For DNA/RNA molecules only, it will give restriction map information, Motifs, and ORF information.
Starting the wizard from the molecule display
If you want to generate a report on a molecule presented in the molecule display window, choose the report type from “Molecule/Reports” menu of the application window. This approach will use the current molecule display profile, and it will not offer a selection, unlike starting the wizard from the database explorer window.
Customizing your report
The report generation wizards for both report types provides you with a number of steps that are necessary to collect the required information. Some steps are common to both report types, while some are specific one report.
The wizard consists of a window with navigation buttons at the bottom that offers you options at every step. You can navigate through, and step forward or backward using “Next>” and “<Prev” buttons. You can the cancel generation process at any time by pressing the "Cancel” button, at any step you can press the "Finish” button to generate a report according to the current settings.
The first step is common for both wizards – it offers you the option to either create a new report from scratch using the default setting, or to select one of previously saved set of options known as the report template. Both ways allow you to select any option; the only difference is in the starting settings. Selecting the "new report” will initialize the options with the default settings, and selecting an existing report template will initialize the options with settings saved from previously created reports. For example, if you decide to generate report from an existing template, you can press “Finish” immediately after selecting desired template if you do not want to alter anything.
General Information report
Step one. Selecting the setup profile
If you start the wizard from a molecule display window, the wizard will automatically use current the display setup profile and skip the first step.
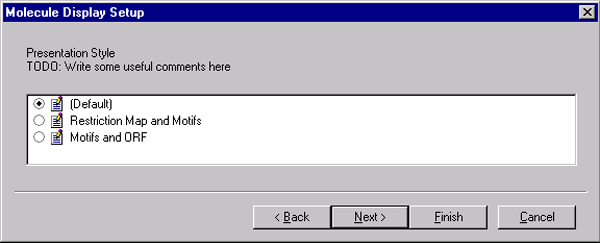
If you start the wizard from a database explorer window, you will be presented with a list of existing display setup profiles to choose from. Since Vector NTI stores profiles separately for DNA/RNA and protein molecules, you will see the profiles according to the type of molecule(s) you are generating the report for.
The setup profile indicates whether particular information should be loaded. DNA/RNA molecule profiles include feature map settings, restriction map settings, motif settings, ORF settings, and sequence setup. Protein profiles include only feature map settings and the sequence setup.
This is an important step, because the selected setup profile must include the information that you want in your report. You may easily exclude unwanted information that you have included in the profile. For example, if the selected profile includes restriction map information and does not include feature map information, you will be able to suppress presenting restriction map information later. You will not be able to include the feature map information unless you select another profile that includes it.
Step two. Selecting general options
This step allows you to specify particular fields you want to see in your report. For your convenience, all of the options are presented as a tree. You can include or exclude informational fields by clicking the left mouse button or by pressing the space bar. Due to the hierarchical organization, if you include the parent item, all of the descendants are automatically included. Excluding descendants automatically excludes their parent item as well. Grayed items indicate that the item's state cannot be changed. This notation usually indicates either mandatory fields or information that could be included in the report, but it is unavailable right now because it was not generated prior to starting the generation wizard.
General description
This group of options consists of general information fields.
- The name field holds the name of the molecule
- The type field specifies whether molecule is DNA/RNA or protein.
- The length fields represents molecule sequence length
- The description holds user notes about the molecule
- Form is specific to DNA/RNA molecules, which may be either linear or circular.
- Creation and modification time are self-explanatory
- The extra information field holds miscellaneous information:
- For DNA/RNA molecules: the complexity of a molecule (basic, designed or constructed), storage type, sense and antisense primer information for DNA/RNA
- For proteins: This shows if the sequence is truncated from either the N-terminus or C-terminus and if the first amino acid is methionine.
Molecule name, type and length fields are mandatory and cannot be excluded from the report information.
Standard fields
- Keywords: keywords associated with the molecule
- Original source database
- Division
- Dataclass
- Modification date in the original database
- Original accession number
- Unique identifier in the original database
- Sequence source
- Organisim(s)
- Organella
- Taxonomy
- Associated genes
- Database links
- SSBM specific fields
User-defined fields
If this item is checked, the report will include all user-defined fields associated with a given molecule.
Authors
This specifies the original and/or current authoring information.
References
This will include any references associated with the molecule
Comments
This will include any comments associated with the molecule.
Feature map
If the molecule contains feature map information, it will be specified here. If this field is checked, the wizard will also provide an additional step for adjusting feature map information.
Restriction map (DNA/RNA only)
You can check this item if you want your report to include a restriction map. The output can be represented either as a tree (similar to the restriction map information in the text pane of the molecule display window), or as a table.
Motifs (DNA/RNA only)
You can check this item if you want your report to include motifs. The output can be represented either as a tree (similar to the restriction map information in the text pane of the molecule display window), or as a table.
ORF (DNA/RNA only)
This outlines the ORF information that is present.
Analyses
DNA/RNA molecules)
Analyses information is not stored in the database, therefore, these options are available only if you start the report generation wizard from a molecule display. Your report can include only those analyses that have been performed on a molecule.
Supported options are:
- PCR analyses
- Hybridization probes
- Sequencing primers
- Mutagenesis
- Restriction fragments
Proteins
You can include the following analyses in your report:
- Protein properties
- Acid content
Sequence
Check this option if you want to see the molecule sequence.
Construction information
This option generates construction information for complex molecules, including components and fragments of other molecules.
Step three. Adjusting feature map information
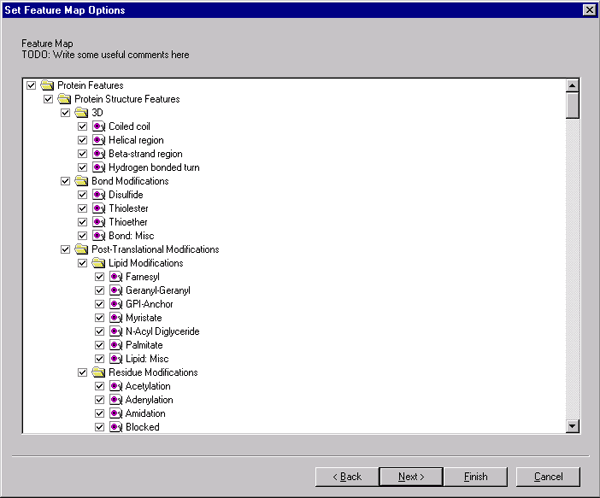
This step is necessary if you chose to include feature map information at previous step. You will see a number of features that can be separately included or excluded from your report according to the molecule type. For your convenience, all available feature types are organized into the same tree structure that is in the display setup profile window.
Relationship Information report
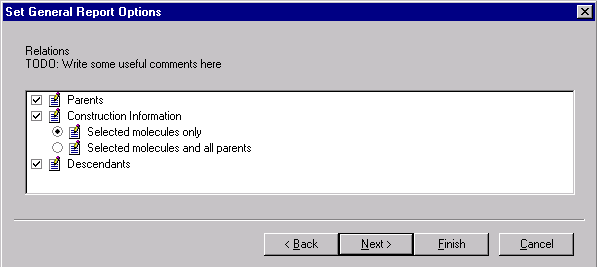
This type of report represents the relationships between molecules. Vector NTI allows you to construct new molecules in several different ways. You can read detailed information on constructing molecules in Chapters 7, 8 and 9 of this manual.
Step one. Selecting relationship options
Generation of this report consist of only one step.
The relationship report may include information on parents, construction and descendants of the molecules involved.
The parents of a molecule are the molecules that were used in it's construction. The molecule itself is called the descendant.
Construction information, similar to the construction information presented in the text pane of molecule display window, may be generated either for selected molecules only, or for selected molecules and all of their parent molecules. The latter option allows you to see the line of inheritance between the molecules.
Reviewing and printing results
When you finish selecting all options or if you press the "Finish” button at any step of report generation process, the wizard will show you the report results window. The results are represented in a hierarchical tree-like structure. This structure allows you to hide the information that you think is unnecessary by closing the appropriate branches.
You can scroll through this window by using the standard scroll bars, and ToolTips will show up if you hold mouse cursor for a while over the item that is not fully visible. Like the text pane of molecule display window, clicking the right mouse button (control click on Macintosh) on items reveals a popup menu that has commands for expanding and collapsing folders and subfolders in various combinations.
If you are satisfied with the information presented, you may print it, or you can copy the information to the file or clipboard.
Printing and previewing information
Before printing it, you may want to preview results, as it would print on the selected printer. Pressing "Print Preview” button switches to preview mode. You can navigate though the pages using the "Next Page” and "Prev Page” buttons. You can use the zoom function by clicking the left mouse button on the window or by pressing "Zoom In” button. It is also possible to switch simultaneously between the pages being viewed. If you want to print the results
immediately, just press the "Print” button to invoke standard printing dialog.
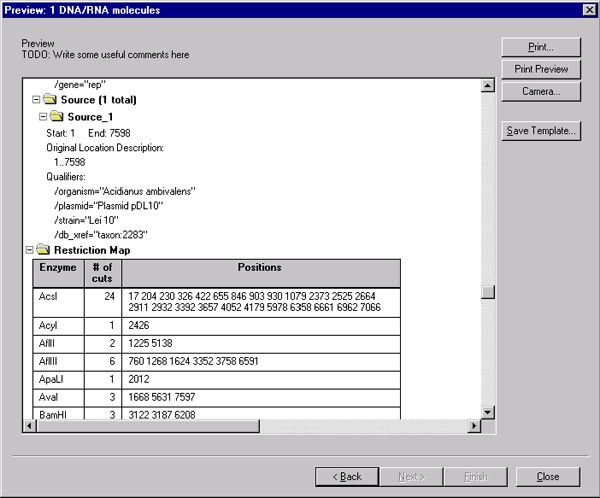
If you want to alter something, click “Close” button to return to results. You will be able to go back several steps and change the generation options, and you will be able to expand or collapse some branches to customize your report presentation. You may print your report right from results page at any time by pressing the "Print” button.
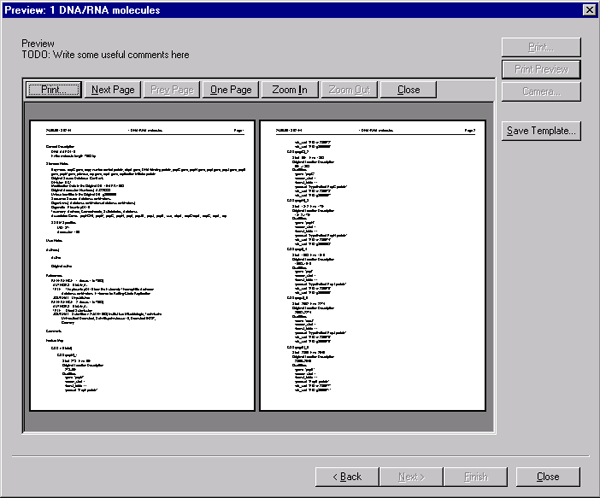
The standard Vector NTI camera allows you to copy results to the file or clipboard by using the "Camera” button.
Saving report templates
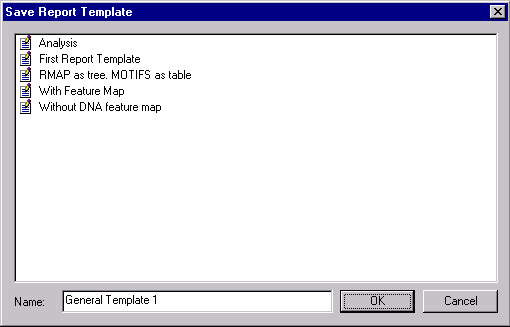
Since the report generation process offers you a number of options, it may be wise if you frequently save the configurations that are used as templates. If you press the "Save Template” button, the window displays the existing templates. You should give template a name, and press OK to save it. For your convenience, templates are saved separately for both report and molecule types. For example, when generating relationship report for DNA/RNA molecules, wizard will offer you templates saved for same type of report and molecule type.
Managing report templates
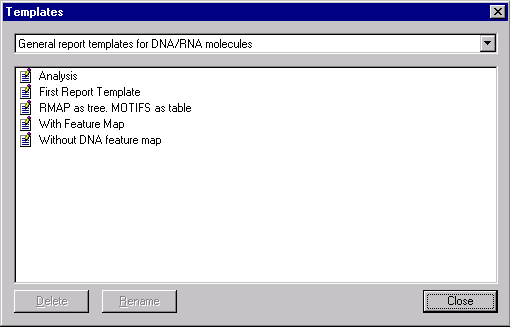
You can delete or rename existing report templates using the report template manager. It can be invoked by the "Reports/Templates…” menu from either the database explorer window or the molecule display window.
Report templates are stored separately for DNA/RNA molecules and proteins. In order to view the templates for a given report, use the combobox at the top of the template window. Press the "Delete” button to remove selected template. Press “Rename” button to rename selected template. In either case, you will be asked to enter a new template name.
Summary
This chapter has described Vector NTI report generation capabilities, including the report generation wizard and report templates.
See Also:
Chapter 1 -- Display Windows
Chapter 11 -- Display Windows and User Interface
Chapter 15 -- Database Operations
Chapter 10 -- Working With Gel Display windows
Chapter 12 -- Gel Display Windows
Introduction
Chapter 9 -- Advanced Molecule Design
Back to Index